
Before you install a new epoxy floor, especially in Denver, test the concrete for moisture. It's crucial. Excess moisture spells trouble.
Epoxy creates a strong bond. If too much moisture is trapped under the epoxy, it will try to escape. This can cause the epoxy to bubble, peel, or fail. No one wants that after buying a new floor.
This applies if you're a homeowner wanting a nice garage floor, a commercial property owner updating your retail space, or a real estate investor flipping a property. General contractors and property management companies should also listen. Ignoring moisture levels results in rework later.
What if you skip this step? Expect potential delamination, where the epoxy separates from the concrete. Need a reliable Flooring Contractor in Denver property owners recommend for durable floor coatings.. You might see blistering, discoloration, and a breakdown of the flooring. Then you must deal with repairs or replacement. That wastes money. Moisture can cause mold and mildew growth, creating unhealthy conditions. So, test the concrete!
Where does concrete moisture come from? Rain is one source. Groundwater can seep up through the slab, especially without a vapor barrier. Also, incorrect curing when the concrete was poured can make it porous and prone to absorbing moisture. Leaks from plumbing or the roof can also cause issues.
Why is moisture a problem when you put down epoxy? Epoxy and water don't mix well. Applying epoxy over damp concrete can cause problems. First, bond failure can occur. The epoxy won't stick to the concrete, and it will peel off. Second, bubbling can happen. Moisture trapped under the epoxy becomes vapor and creates bubbles. This weakens the epoxy and looks bad. Finally, microbial growth is possible. Damp areas are good for mold and mildew. Trapped moisture under epoxy creates a breeding ground, which can cause health problems and bad smells. Moisture testing matters.
Denver's climate is hard on concrete because of the big seasonal changes. Hot summers change to freezing winters. These temperature changes make concrete expand and shrink, which can cause cracks and more water absorption. The freeze-thaw cycles are very hard on concrete. Water inside the concrete freezes, expands, and hurts the material. This constant stress affects how epoxy sticks, so you must deal with it.
In the warmer months, Denver's dry air can fool you into thinking your concrete has no water in it. But water can still be deep inside the concrete, especially if the concrete touches wet ground or lacks a vapor barrier. Then, winter comes, and that trapped water becomes a big issue. It's not just about water on the surface. It's about what happens inside the concrete all year.
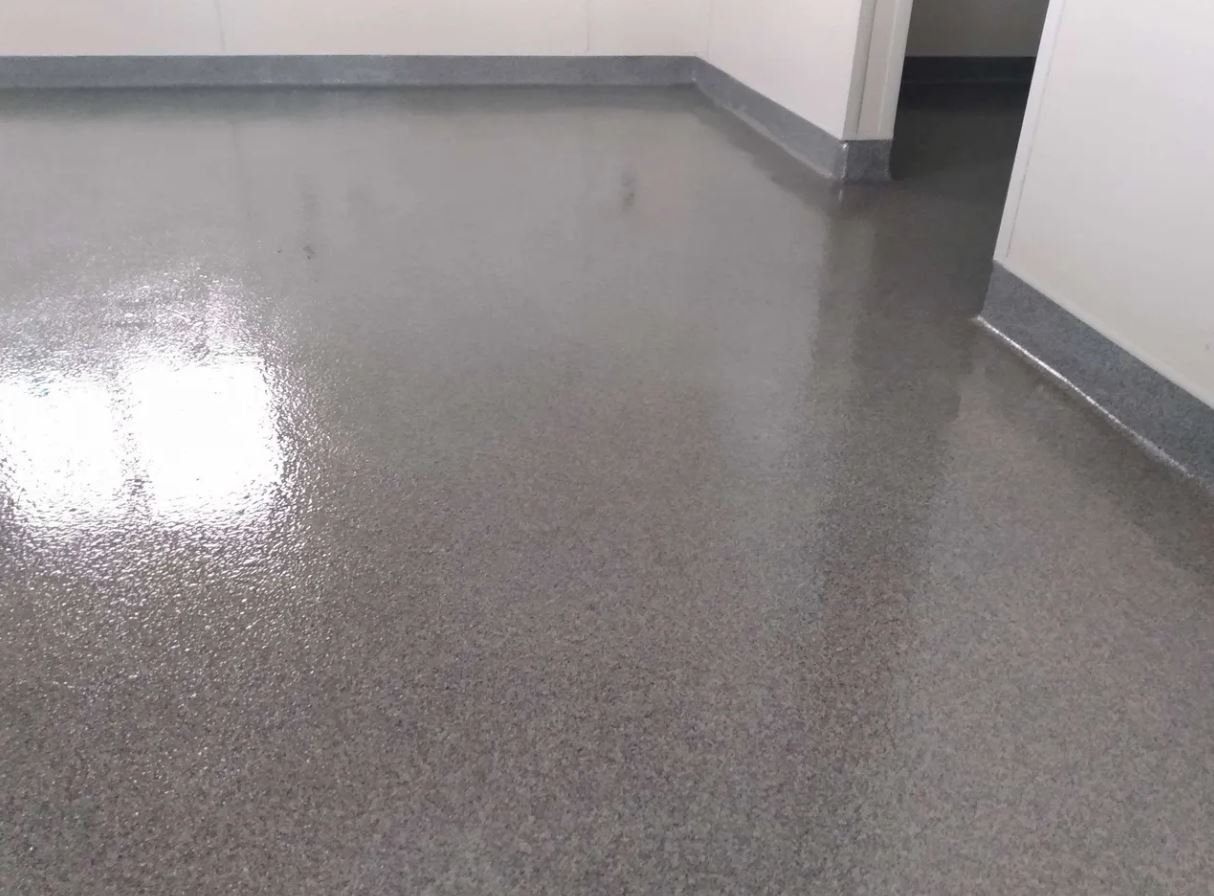
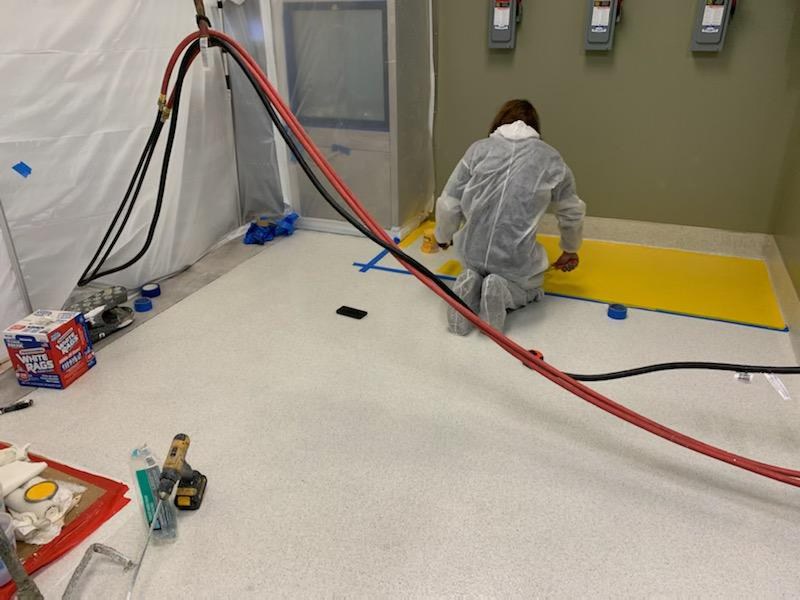
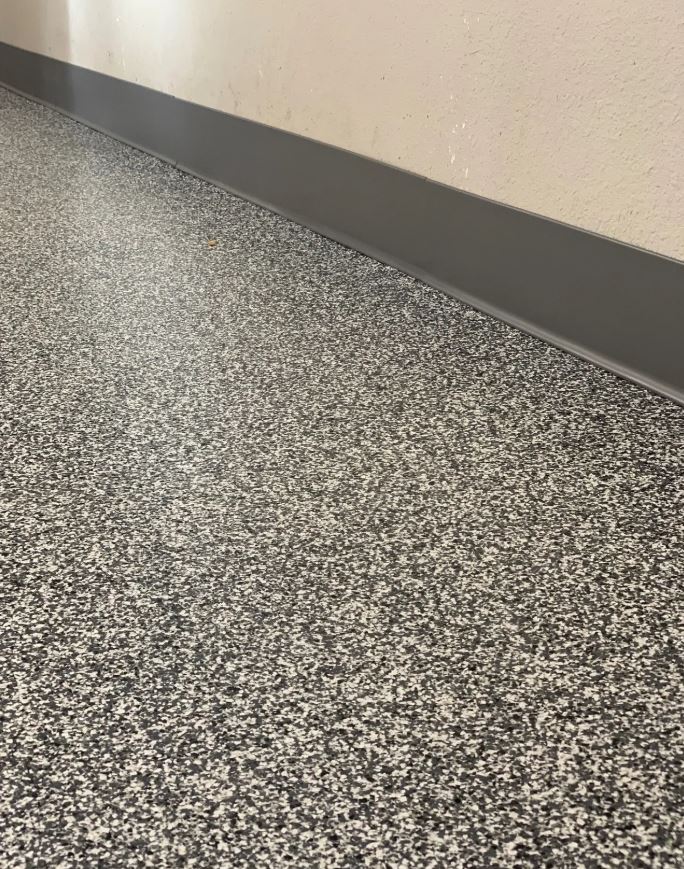
Before you put down epoxy, surface repair is key, mostly with older concrete. This often means grinding the surface to get rid of old stuff, dirt, and loose bits. Fixing cracks with a concrete repair product is also needed for a smooth surface. This prep work makes sure the epoxy has a strong base to stick to, which stops future problems.
Grinding concrete isn't just about looks. It makes a surface that epoxy can grab. Think of it like sanding wood before paint. You want a rough surface so things stick well. Also, grinding helps remove things on the surface that could mess with the epoxy's grip. Buying a good concrete grinder and the right grinding pads is key for a floor that looks good and lasts.
Water testing is a must in Denver. Don't guess that the concrete is dry because it looks like it. Use a good water meter to get real numbers in different spots on the concrete. If water levels are too high, you must dry out the concrete before putting on epoxy. If you skip this, you could have bubbles, peeling, and expensive fixes later.
When you prepare to put down epoxy, especially in places like Denver where the weather changes quickly, ensure the concrete is prepped correctly. That often means dealing with concrete that has aged. This means grinding down the old surface to remove any debris, patching cracks or holes, and perhaps applying a base coat to give the epoxy something to grip.
Think of it this way: you would not paint a rusty car without sanding it first, correct? The same idea applies here.
Now, there are standards you should know. ASTM F2170 is a key one. This tells you how to use probes to measure the moisture inside the concrete. Then there is ASTM F1869, which tests how much moisture comes up through the concrete surface using calcium chloride. Ignoring these standards invites problems. The epoxy might not stick, you could get bubbles, or the whole thing could fail sooner than expected.
Taking the time to restore the concrete first is not just about appearance. It ensures your new flooring lasts. It is an investment that pays off.
So, you’re prepping to put down epoxy. Nice. First, you must test the concrete for moisture. Skip this, and the epoxy could fail. Expect bubbles, peels, and a big mess.
There are several ways to test. The calcium chloride test is common. You put calcium chloride under a sealed dome on the concrete. Then you see how much moisture it absorbs over a few days. It’s accurate, but it takes time.
Next is the relative humidity (RH) test. This means drilling small holes in the concrete. Then you insert probes to measure the humidity inside. This is popular because it shows the moisture conditions deeper within the concrete, not just the surface. You do need the right tools.
Another choice is electrical impedance. These meters measure the electrical resistance of the concrete. Moisture changes the resistance, so you get a reading. It's quick, but not always as accurate, especially if the concrete has salts or minerals.
Each test has pros and cons. The best one depends on the situation. Skip this step, and you invite problems. Take my word for it.
Epoxy Flooring: Identifying Potential Adhesion Failure Points
You're prepping to apply epoxy and need to check the concrete moisture. Good idea. Follow the ASTM F2170 standard for a relative humidity (RH) test. It explains how to get accurate readings from inside the concrete slab.
First, drill holes to about 40% of the slab thickness. For a 5-inch slab, drill 2 inches deep. Remove all dust from the drilling. Then, put the RH probe sleeve or liner into the hole. The probe will sit in this.
Next, let the holes sit. This means letting the temperature and humidity inside stabilize. The standard says to wait at least 24 hours before taking a reading. Don't skip this.
After 24 hours, put your calibrated RH probe into the sleeve. Be sure it's seated right. Then, wait for the probe to give you a stable reading. Most probes will tell you when they're ready. Write down the RH percentage.
What does the number mean? Most epoxy makers specify a maximum RH level for putting it down. If your reading is higher, fix the moisture issues before you apply epoxy. Skipping this can cause epoxy failure. No one wants that.
Let's discuss the Calcium Chloride test, also known as the Anhydrous Calcium Chloride test. This test follows the ASTM F1869 standard, and it's important before you lay down epoxy. Here is why: Epoxy and moisture don't mix. Excess moisture trapped in the concrete can cause bubbling or delamination. Nobody wants that.
First, prep the surface. Grind down the concrete where you'll place the test kits. This removes any surface contaminants or coatings that could skew the reading. Think of it like prepping a wall for paint; you want a clean surface.
Next, carefully weigh the anhydrous calcium chloride. The kit includes specific instructions on how much to use. Accuracy matters. Place the pre-weighed calcium chloride in the test dish, then seal it under the dome per the manufacturer's instructions. The key is to create an airtight environment.
Leave the test kit in place for 60 to 72 hours, depending on the manufacturer's guidelines. During this time, the calcium chloride will absorb moisture from the concrete. After the time is up, carefully remove the dish and weigh the calcium chloride again. The weight difference tells you how much moisture the concrete is releasing.
Finally, calculate the Moisture Vapor Emission Rate (MVER). The test kit instructions include the formula. This rate is measured in pounds of moisture per 1,000 square feet over 24 hours. Compare your result to the epoxy manufacturer's advice. If your MVER is too high, you'll need to reduce the moisture content before installing the epoxy. Ignoring this step is a recipe for disaster.
You've done your concrete moisture tests. Now, how do you read the results and know if you can apply the epoxy? This is where it gets specific. You must check the epoxy maker's directions. They tell you the exact moisture limits for their product.
You're looking at a few things. For calcium chloride tests, you want to be below 3 pounds of moisture emitted per 1,000 square feet over 24 hours. Relative humidity (RH) probes in the concrete should read below 75%, but some epoxies allow a bit higher.
Here is why: going over those limits can cause problems. The epoxy might not stick. You could see bubbles, peeling, or a failed floor. No one wants that after spending time and money.
Remember, these are general guides. Some high-performance epoxy coatings are more sensitive to moisture than others. Also, temperature matters. A slab might pass the moisture test at one temperature but not at another. If you're close to the limit, test under conditions that copy the floor's typical use.
If you fail, don’t worry. There are ways to fix it, like moisture vapor retarders. But that’s another topic.
You have a concrete slab with too much moisture. What are your options for getting that under control before you install epoxy? There are a few ways to handle this, and the best one depends on the situation.
First, consider moisture vapor barriers. These are sheets of material you put under the concrete slab when it's poured. If you're dealing with an existing slab, this isn't an option. But for new construction, it's a must.
For existing slabs, you might look at chemical treatments. These get into the concrete and react to reduce moisture. It can be effective, but you need to make sure you choose the right product for your specific concrete type and moisture level. Do your research.
Dehumidification is another option. You use dehumidifiers to pull the moisture out of the air and, indirectly, out of the concrete. This can take time—days or even weeks—and it can be costly, especially for large areas. But it's a non-invasive option.
Cost-wise, vapor barriers during new construction are generally the least expensive upfront. Chemical treatments can be mid-range, but the cost can climb depending on the product and the area you're covering. Dehumidification is usually the most expensive because of equipment rental and energy costs, but it might be the only option in some cases. Skip these steps, and expect your epoxy to fail. It will bubble, peel, and look terrible. Then you're back to square one, but with a bigger mess.
What happens if you skip the concrete moisture test and apply epoxy to damp concrete? You are asking for trouble.
First, flooring failure is likely. Epoxy will not bond to concrete with too much moisture. It might bubble, peel, or delaminate. Imagine spending money and time, only to have your new floor fall apart. Not fun.
Also, moisture trapped under the epoxy can cause mold growth. Mold can cause health problems, smell bad, and damage your building. Nobody wants that.
Here is why fixing these problems will cost you a lot. You must remove the failed epoxy and deal with the mold. Then, properly prepare the concrete before installing a new floor. This could mean thousands of dollars in repairs. Skipping the moisture test might seem like a way to save time and money now, but it will cost you more later. Trust me, doing it right the first time matters.
When it comes to concrete moisture testing before an epoxy install, you might want to do it yourself. But hiring professional flooring contractors in the Denver area is a better move. Here is why: expertise.
These contractors don't just show up with a basic moisture meter. They understand concrete, Denver's climate, and how moisture behaves. They have the experience to read results right, which matters.
Plus, they use gear that gives more reliable info. They use calibrated meters, probes that measure moisture at different depths, and lab tests for confirmation. Most homeowners or general contractors don't have access to this.
Getting data right matters. If you get the moisture levels wrong, your epoxy floor will fail. It could bubble, peel, or not bond. That means wasted money, time, and frustration. A professional assessment saves you from these issues.
Calibrating the moisture meter according to the manufacturer's instructions is crucial. Calibration ensures the meter provides accurate and reliable readings. Regular calibration, especially before each testing session, accounts for environmental factors and meter drift.
Proper surface preparation is paramount for accurate concrete moisture testing. This involves removing any coatings, sealers, or contaminants that could interfere with the readings. A clean and sound surface ensures the moisture meter or testing method directly interacts with the concrete substrate.
Thorough documentation of the concrete moisture testing process is essential for future reference. Record the date, time, location of each test, and the specific readings obtained. Include details about the testing method used, ambient conditions, and any observations made during the process.
Let's examine real-world examples of moisture testing. This is especially important in Denver, given our climate. We've seen great epoxy floor makeovers, but they begin with careful prep.
Consider the brewery downtown. They wanted a tough, easy-to-clean floor for their taproom. We ground down the existing concrete and patched cracks. Before epoxy, we did moisture tests. The slab had moisture transmission issues, likely from the nearby creek.
Ignoring that would have been a problem. The epoxy would have blistered and failed fast. Instead, we installed a moisture vapor barrier *before* the epoxy. It cost more at first, but it saved them money later. They’ve had that floor for five years now, and it still looks great.
Next, there was the warehouse out by the airport. It had old concrete that needed work. This time, the moisture came from poor drainage around the building's foundation. We used a different system: a breathable epoxy primer. It allows moisture to escape slowly without damaging the topcoat. Again, testing helped us choose the right fix. It saves trouble later.
Let's talk about the money side of concrete moisture testing and fixing moisture problems. It's important to understand this early so you can budget for your epoxy flooring.
Expect to pay from \$3 to \$8 per square foot for moisture testing. The cost depends on the area size, the tests used (calcium chloride tests are common), and where you are. Some contractors might include the testing cost in the flooring installation if you hire them for the whole job. Ask about that!
If tests show high moisture, mitigation is next. Mitigation reduces moisture so you can install the epoxy without problems. This may involve applying moisture barriers, which might cost \$2 to \$6 per square foot. Or, you might need concrete grinding or a sub-slab depressurization system. Those can be expensive, costing thousands of dollars.
Get a clear, detailed quote from your contractor that lists the costs for testing and possible mitigation. Ask questions and understand what you're paying for. Ignoring moisture problems will cost you more later with epoxy failure, so it's worth investing in the right solutions now.
You likely have questions about concrete moisture testing. What is it? Why do it? Here are some answers:
Why test for moisture? If you skip this step and put epoxy over concrete with too much moisture, expect problems. The epoxy will not bond well. Bubbles, peeling, or total floor failure will happen. It is like painting a wet wall; it just won't work.
When should you test? Always test before you put in any flooring that reacts to moisture, especially epoxy. Even if the concrete looks dry, moisture may hide inside. Test after the concrete cures fully, and after any patching or surface repairs finish.
How do you test? Some options exist. Calcium chloride tests are typical. You put a small container of calcium chloride on the concrete, seal it, and weigh it before and after a set time (often 72 hours). The weight difference shows how much moisture the concrete emits. Relative humidity (RH) probes are another choice. You put these into drilled holes in the concrete to measure the humidity inside. Both ways give you key facts.
How much moisture is too much? That depends on what the flooring maker says. They will name a top moisture content or RH level. Going over those limits means you must deal with the moisture first.
What if the test fails? Do not worry. Ways exist to lower moisture in concrete. You may need to put on a moisture vapor barrier, make ventilation better, or use dehumidifiers. The goal is to get moisture levels in range before you put in the epoxy. If not, you waste time and money.
Surface fixes matter before you install epoxy flooring. You can't just put epoxy on any concrete and expect good results. It's like building a house on a bad base.
First, check the concrete. Experts look for cracks, damage, and old coatings. These things could cause problems with the new epoxy. Then, fix the surface. This means grinding it down to remove flaws, patching cracks, and making sure everything is even. This gives the epoxy a clean, solid base to stick to.
What happens if you skip these steps? It's a bad idea. The epoxy might not stick right. You could see bubbles, peeling, or an uneven look. Then, your new floor will look bad fast, and you'll spend more money later.
A process with many steps helps surfaces last longer and gives you great results on older floors. It might seem like hard work, but it pays off. Surface fixes are an investment. You make the floor look good and ensure it lasts. For owners, that's a smart way to protect their investment.